How to set up Entra ID as an IDP for use with CLOWD9
This step-by-step guide shows you how to set up keycloak as a service provider for Entra ID Single Sign-on (SSO).
Single Sign-On (SSO) makes logging into multiple applications easier and safer. SSO allows users to authenticate once and access everything without needing to sign in again.
This guide explains how to configure to enable SSO via with Microsoft Azure Active Directory (Entra ID).
Our goal is to help you set up authentication to work smoothly with Entra ID, ensuring users can log in seamlessly and securely. We’ll keep things clear and straightforward.
What You’ll Need
Before starting, make sure you have:
- An Entra ID tenant with administrative access
- Basic knowledge Entra ID admin panels
- Access to a browser for testing
Why Use Entra ID?
Entra ID (previously Microsoft Azure AD) is widely used for enterprise user management. Combining this with our authentication allows your application to use Entra ID’s secure user database while leveraging our authentication component (Keycloak) for SSO and role management.
This setup is especially useful for businesses that want a unified login experience across multiple platforms.
Step 1: Understand the SSO Flow
Here’s how the SSO process works in simple terms:
- A user tries to access CLOWD9 Vista Portal.
- The app redirects them to Keycloak.
- Keycloak checks if the user is logged in. If not, it sends them to Entra ID’s login page.
- The user enters their Entra ID credentials (like email and password).
- Entra ID verifies the user and sends authentication details back to Keycloak.
- Keycloak issues a token to the application, allowing the user to access it without logging in again.
- User roles from Entra ID groups can be used to control what the user can do in the app.
- This flow ensures secure and smooth access while keeping user data managed in Entra ID.
Step 2: Azure App Configuration
-
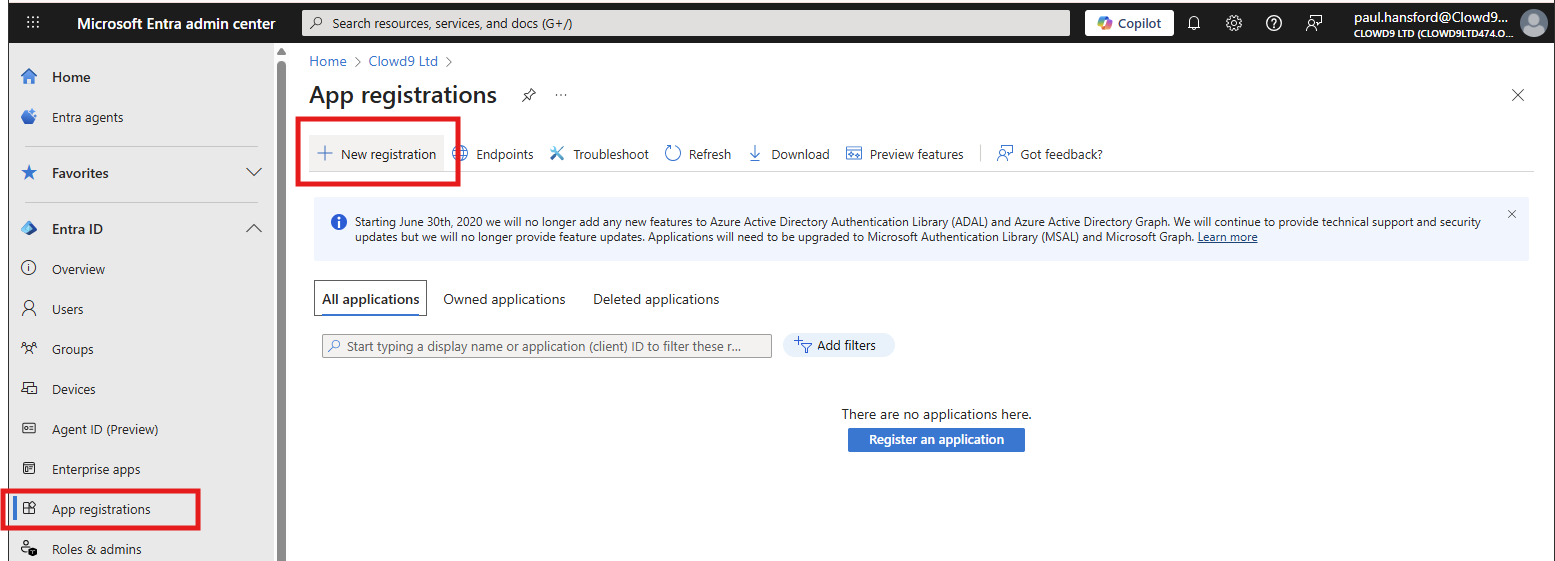
Create a new App registration from portal.azure.com selecting support for Multiple organizations when asked. You can find App registration in search.
-
Click New registration.
-
Fill in App details
- Use any name you like to reference it later, e.g. "CLOWD9 SSO Application".
- Enter a redirect URL. Please discuss this with your account manager, it will look something like: https://keycloak.sandbox.apps-clowd9.io/realms/clowd9-vista/broker/azure-ad/endpoint
or
https://vista.prod.clowd9.io/realms/clowd9-vista/broker/reliance/endpoint - Click "Register" when done.

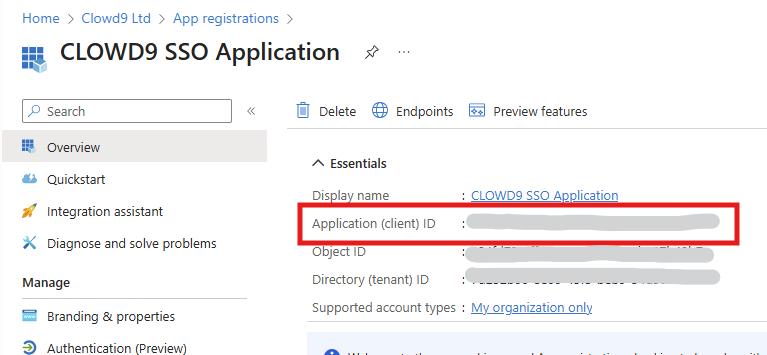
Once the app is created, Azure will show you the Application (client) ID.Copy this value - you’ll need it later.
-
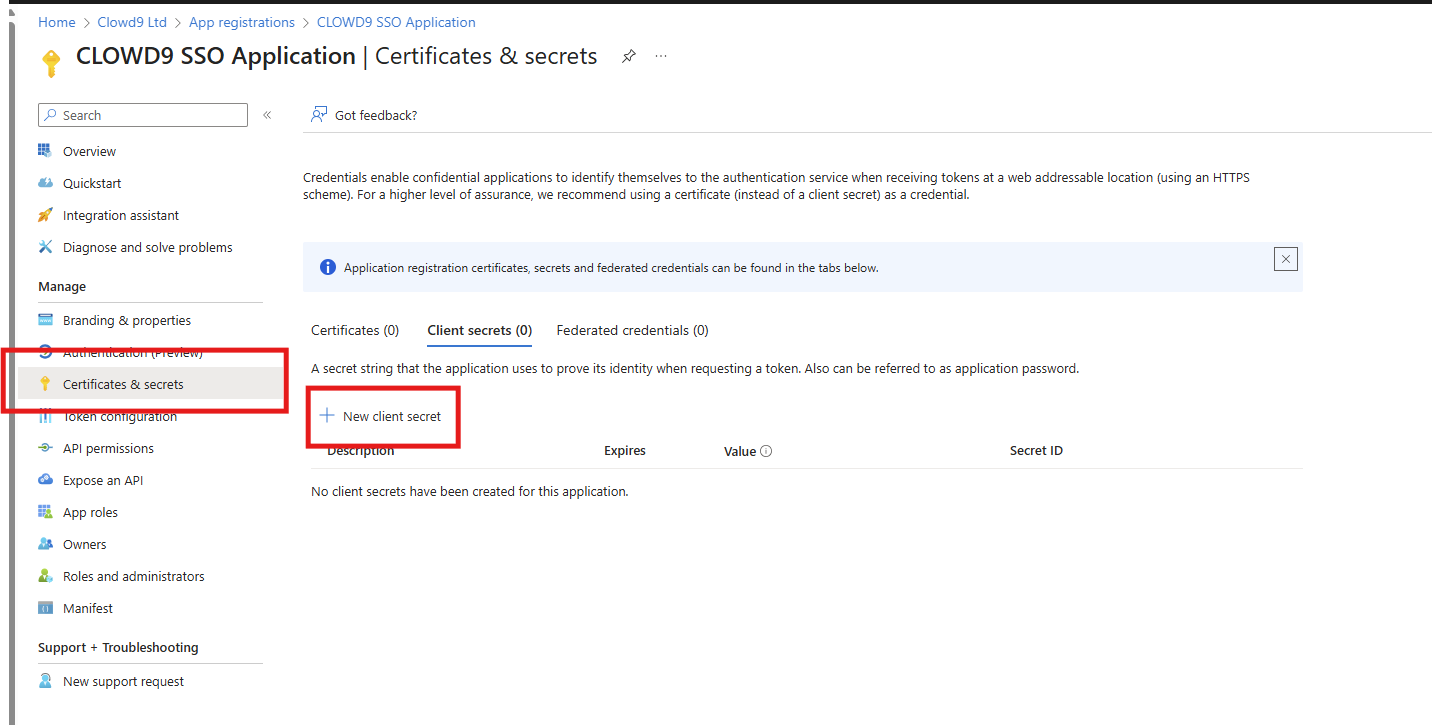
Next, go to Certificates and Secrets and create a new client secret. Save the generated value securely; it will also be used in Keycloak. Use a meaningful name for you and suitable expiry time.
-
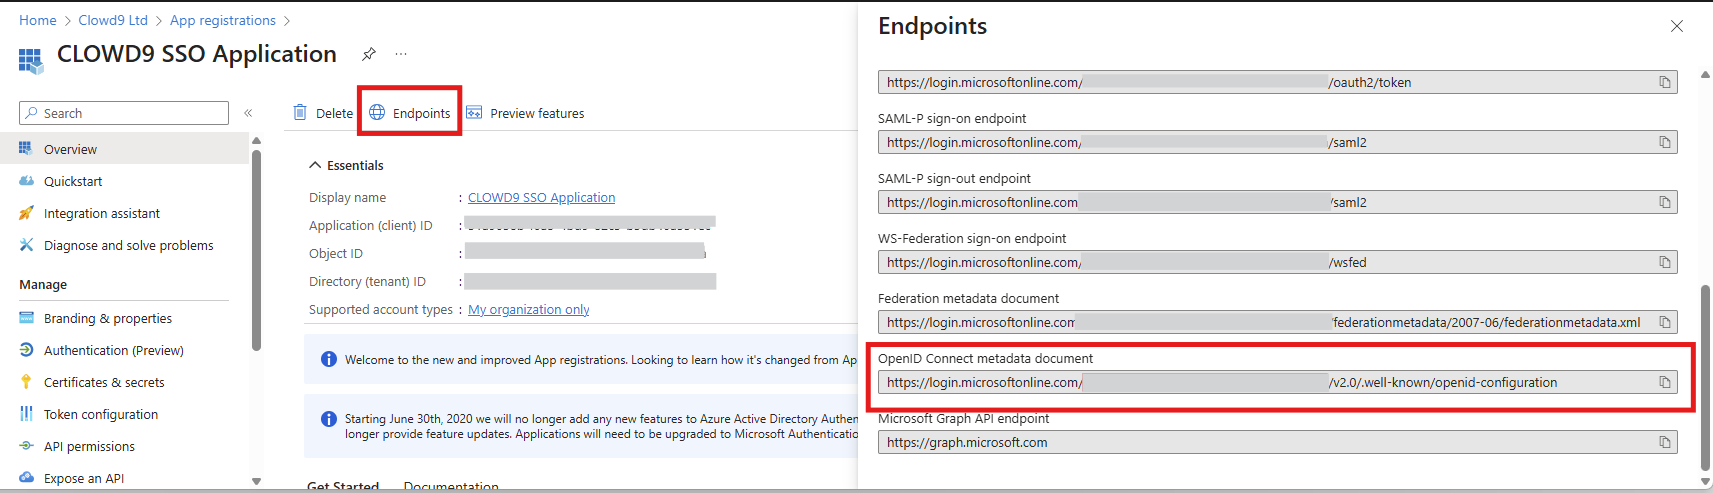
Go back to the app details page and click Endpoints. Copy the OpenID Connect metadata document URL. This will be important for Keycloak’s configuration later.
-
Ensure API Permissions are allowed.
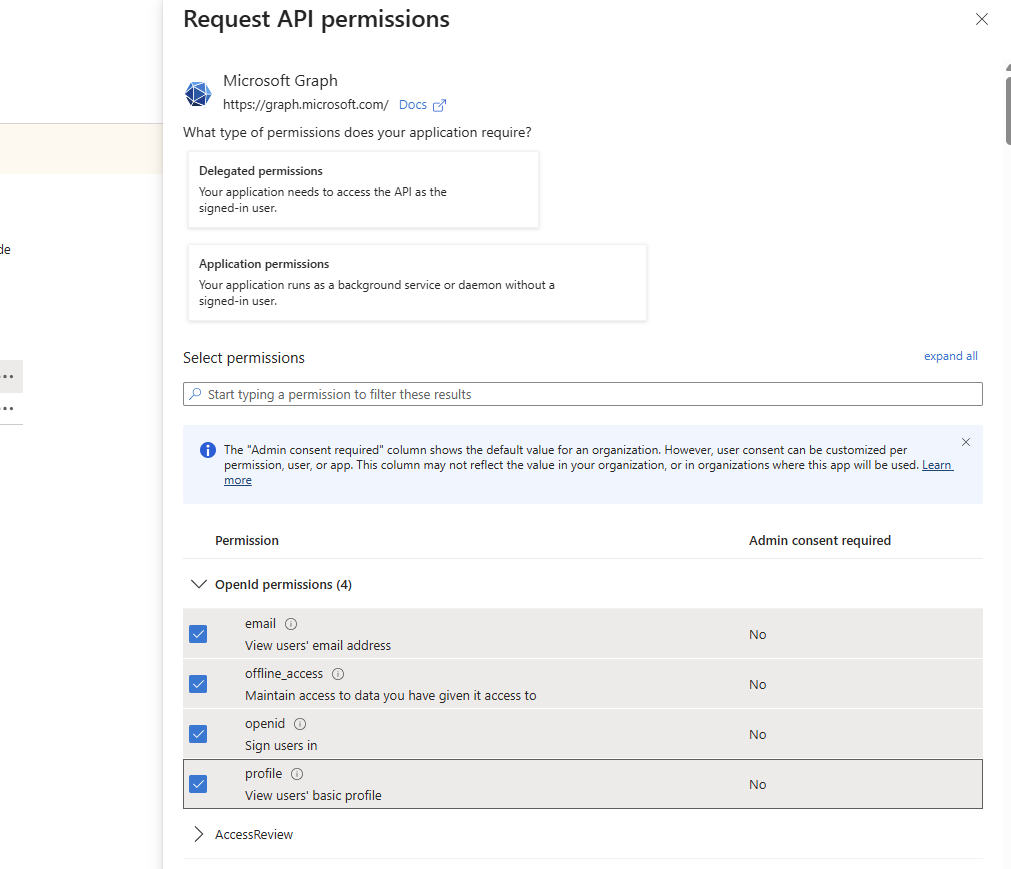
On the application screen, Select API Permissions and then select Microsoft Graph.
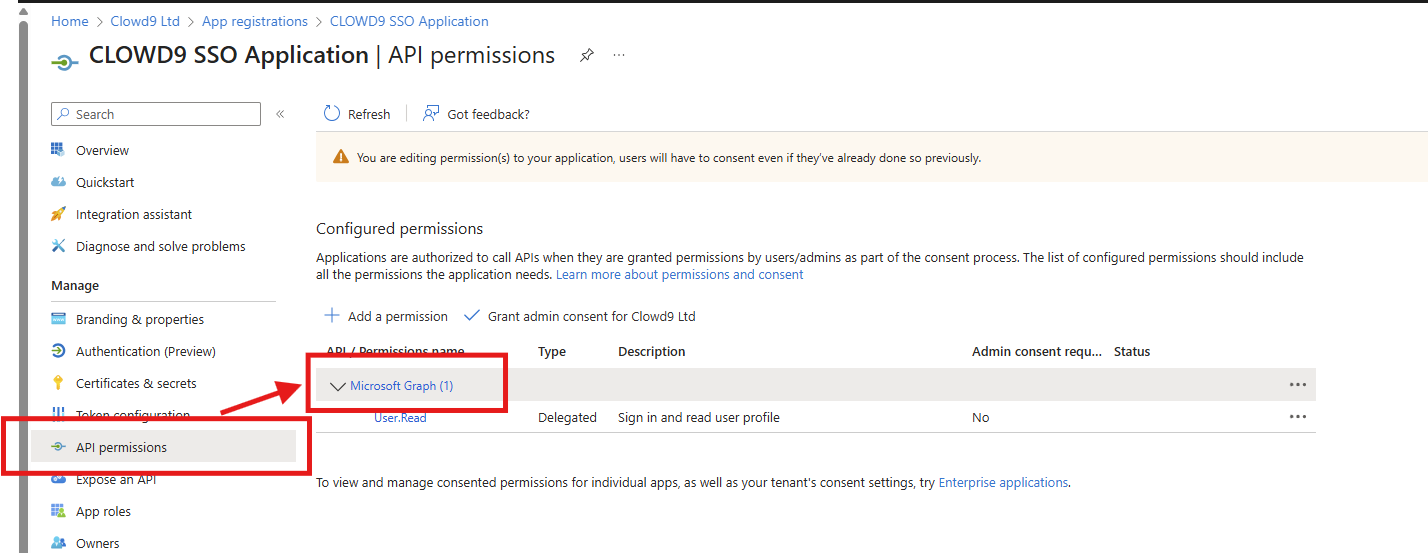
Then ensure all OpenID Permissions are selected, confirm and save with the "Update Permissions" button.
-
It should then look like this:
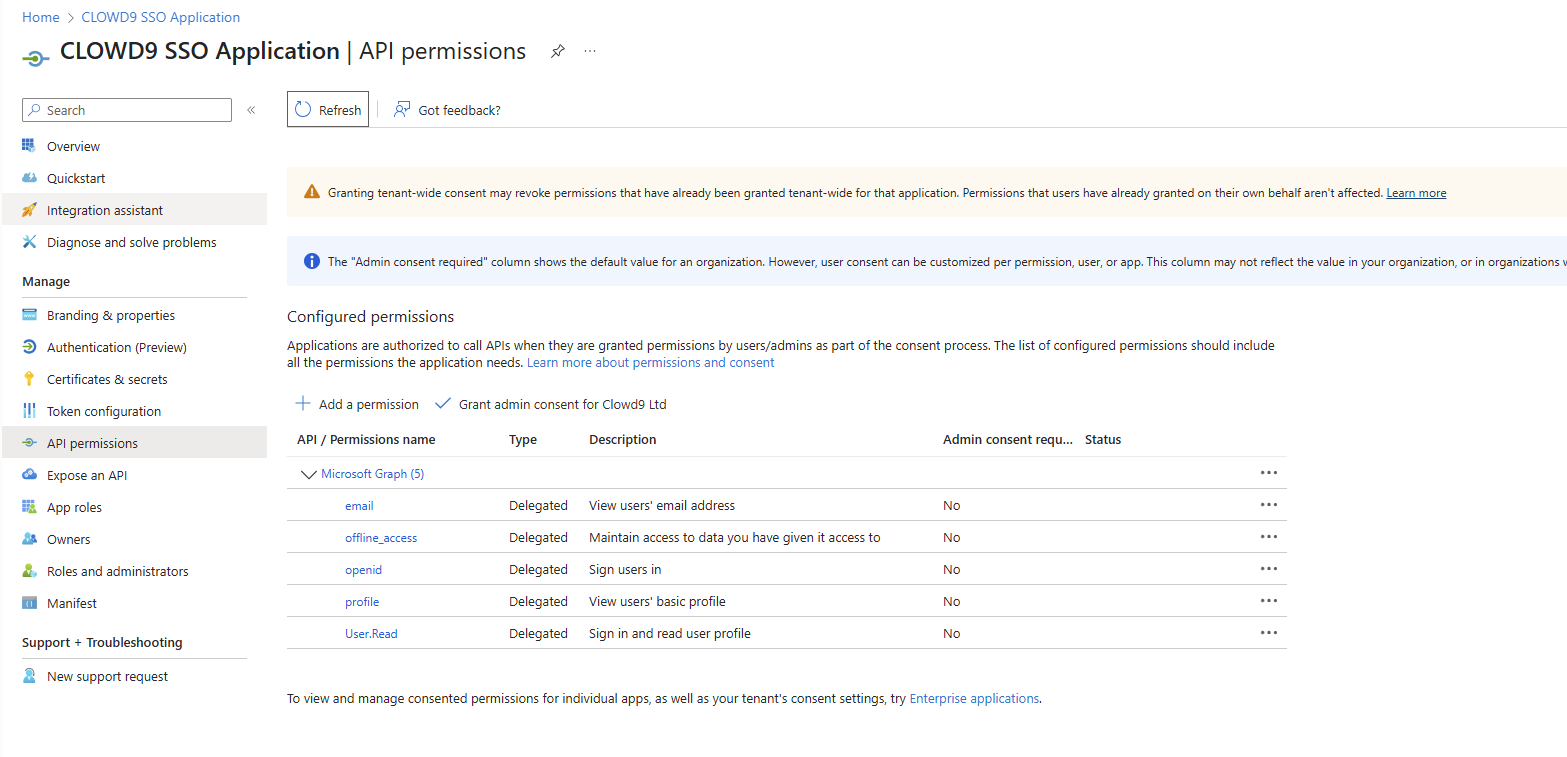
-
Update the "Manifest" to ensure "requestedAccessTokenVersion" is set to version 2 (the default is null).
Once changed, select "Save".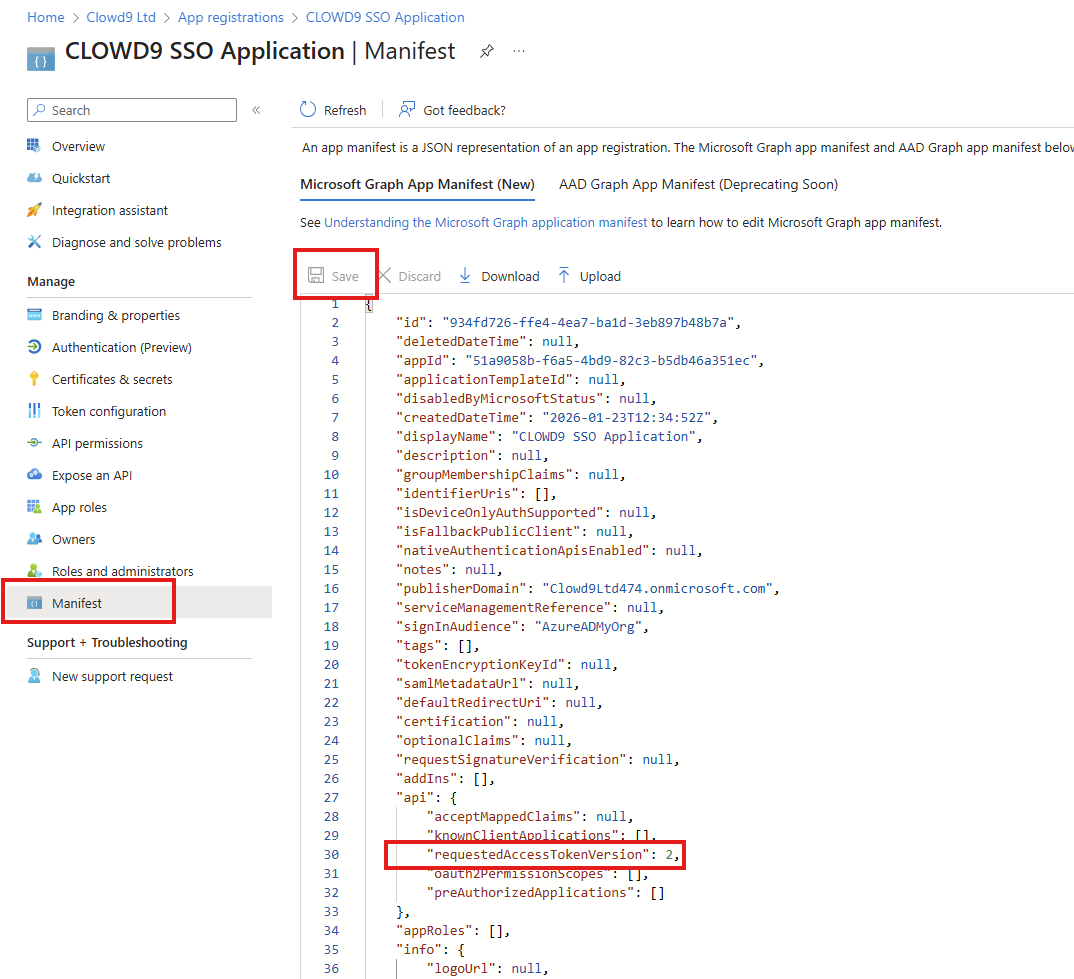
Step 3: Sharing Information with CLOWD9
- Add IdP in KeyCloak by contacting CLOWD9
⚠️This is sensitive data do not share in plain text or over email⚠️
Please use a secure one-time password sharing tool (e.g. Snappass) to transmit the Client ID and Client Secret. - CLOWD9 will need this data from you:
- OpenID Connect metadata document URL (this allows discovering all the other URLs), e.g. https://login.microsoftonline.com/xxUUIDxx/v2.0/.well-known/openid-configuration
- Application (client) ID - this is used as the Client ID.
- Client Secret Value from above.
- "User Info URL" - this is usually the generic Microsoft URL https://graph.microsoft.com/oidc/userinfo.
Step 4: Test Your Keycloak and Entra ID SSO Setup
To make sure authentication works correctly via Entra ID Single Sign-On (SSO) integration, follow these steps to test the login process. This will confirm that users can log in smoothly using their Entra ID credentials.
-
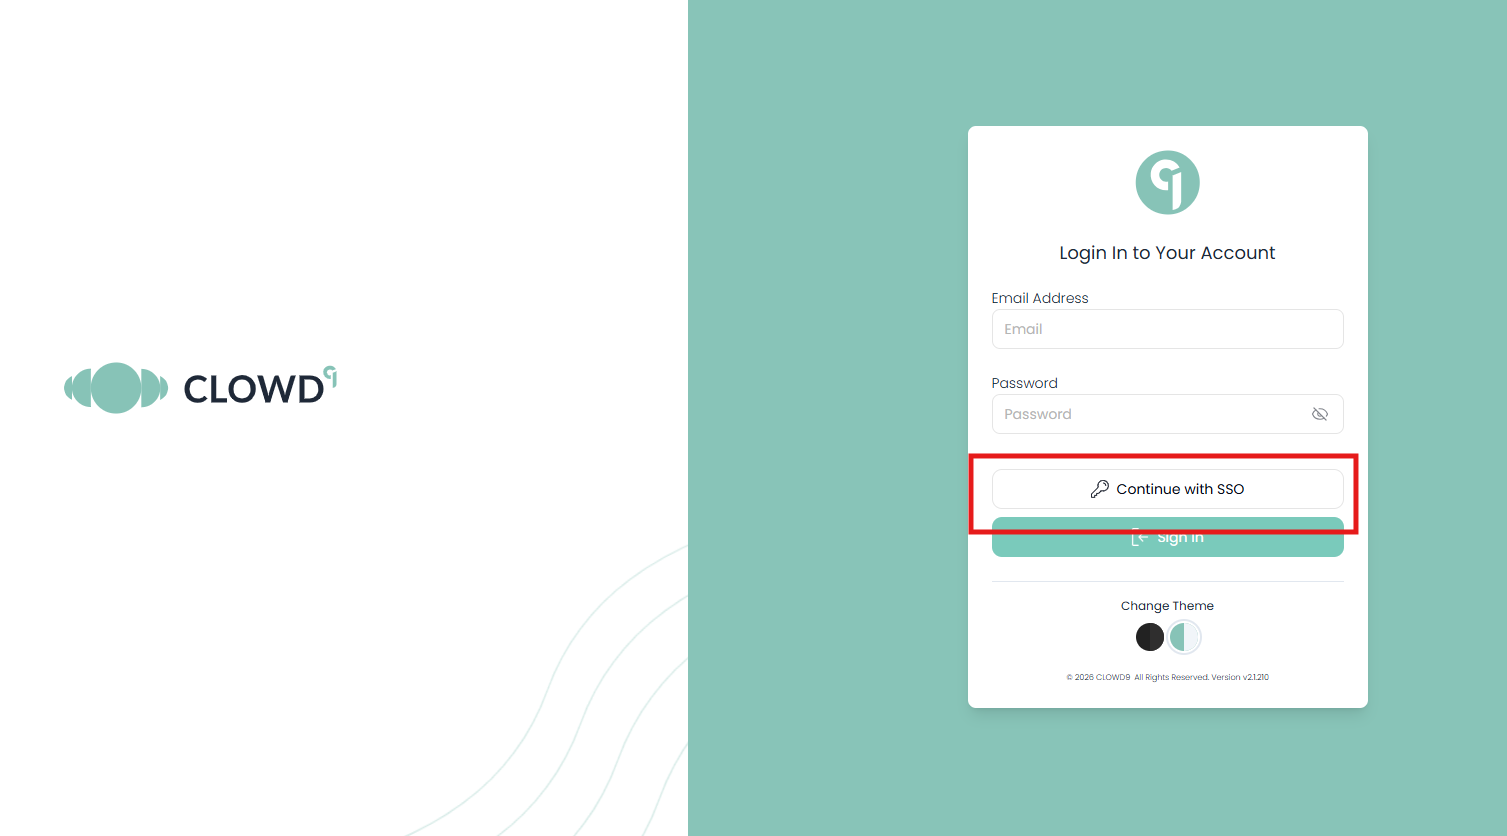
Open your browser and go to your CLOWD9 Vista Portal (logout if you are already logged in). You should see a login page like the one below. Select the SSO option:
-
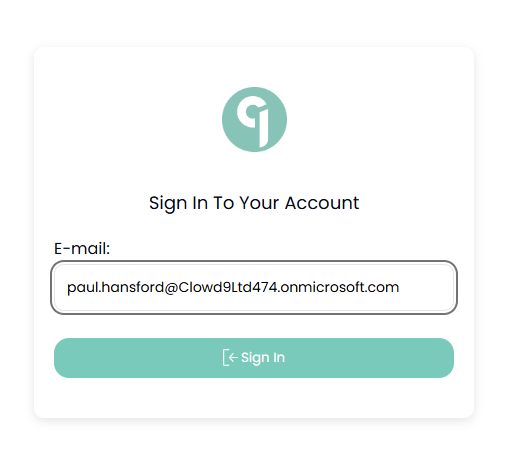
Enter your email address:
-
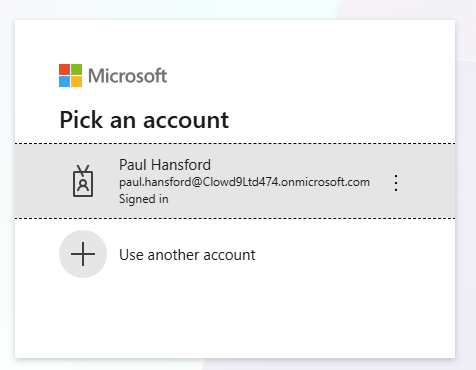
Follow the login steps for your company services:
-
That should complete your login and setup. Seeing this page means the SSO integration is working correctly.
Troubleshooting
If you don’t see the Entra ID login page, double-check your Identity Provider settings.
Ensure your Entra ID credentials are correct and that the user has access to the app. If the profile page doesn’t appear, verify the redirect URI in Keycloak matches your app’s settings.
Updated about 2 months ago